 Save
Save My sourdough starter and I have a complicated relationship—some days it's bubbly and cooperative, other days it sits there judging me quietly. But the one thing that finally made us friends was realizing all that discard didn't have to go to waste. One lazy afternoon, I'd been scrolling through snack options when it hit me: what if I turned that tangy starter into something crispy and irresistible? Twenty minutes later, my kitchen smelled like a bakery and a cheese shop had collided, and I knew I'd stumbled onto something special.
I brought a batch to my neighbor last month, and she ate half the container while standing in my kitchen asking questions about the everything seasoning. That's when I knew these weren't just crackers—they were the kind of snack that makes people pause and actually taste what they're eating instead of mindlessly munching.
Ingredients
- All-purpose flour (1 cup): This is your structure—don't skip it or swap it for whole wheat unless you want something denser and less crispy.
- Sharp cheddar cheese, finely shredded (1 cup): The finer you shred it, the more evenly it distributes into the dough, giving you consistent flavor in every single cracker.
- Unsalted butter, cold and cubed (3 tablespoons): Cold butter is the secret to flakiness—if it's soft, you'll get dense little bricks instead of crispy squares.
- Sourdough starter discard, unfed (1/2 cup): This is your flavor workhorse and honestly why these taste so much better than regular cheese crackers; use it straight from the fridge without feeding it first.
- Salt (1/2 teaspoon): This anchors all the flavors together.
- Garlic powder and onion powder (1/4 teaspoon each): These add savory depth without making the dough wet.
- Everything bagel seasoning (2 tablespoons): If you can't find a good blend, mix your own with sesame seeds, poppy seeds, dried garlic, dried onion, and coarse salt—homemade is often better anyway.
- Flaky sea salt (1 tablespoon, optional): This isn't optional in my kitchen; it adds those little bursts of salt you remember when you bite down.
- Olive oil (1 tablespoon for brushing): This helps the seasoning stick and gives you that light golden finish.
Tired of Takeout? 🥡
Get 10 meals you can make faster than delivery arrives. Seriously.
One email. No spam. Unsubscribe anytime.
Instructions
- Build your base:
- Pulse flour, shredded cheddar, cold butter, salt, garlic powder, and onion powder in a food processor until it looks like coarse breadcrumbs—this takes maybe 20 seconds, so don't overthink it. The texture should look sandy and loose, not clumpy.
- Bring the starter in:
- Add your sourdough discard and pulse just until a soft dough pulls together—you're looking for everything to be combined but not overworked. If you see dry bits, pulse once or twice more, but stop as soon as you see a dough forming.
- Knead briefly on the counter:
- Turn the dough out onto a lightly floured surface and knead it gently for about 30 seconds to smooth it out, using just the heel of your hand. This helps everything hold together without making it tough.
- Chill strategically:
- Divide dough in half, flatten each piece into a disk, wrap them in plastic wrap, and refrigerate for at least 30 minutes—this makes rolling out so much easier and less sticky. You can even chill these overnight if your day gets away from you.
- Prep your workspace:
- Preheat your oven to 350°F and line two baking sheets with parchment paper so nothing sticks. This is also when you'll want to have your seasoning ready to go.
- Roll with intention:
- Take one dough disk and place it between two sheets of parchment, then roll it out to about 1/8-inch thickness—thin enough that it'll crisp up but thick enough to stay together. If the dough springs back, let it rest for a minute and try again.
- Oil and season:
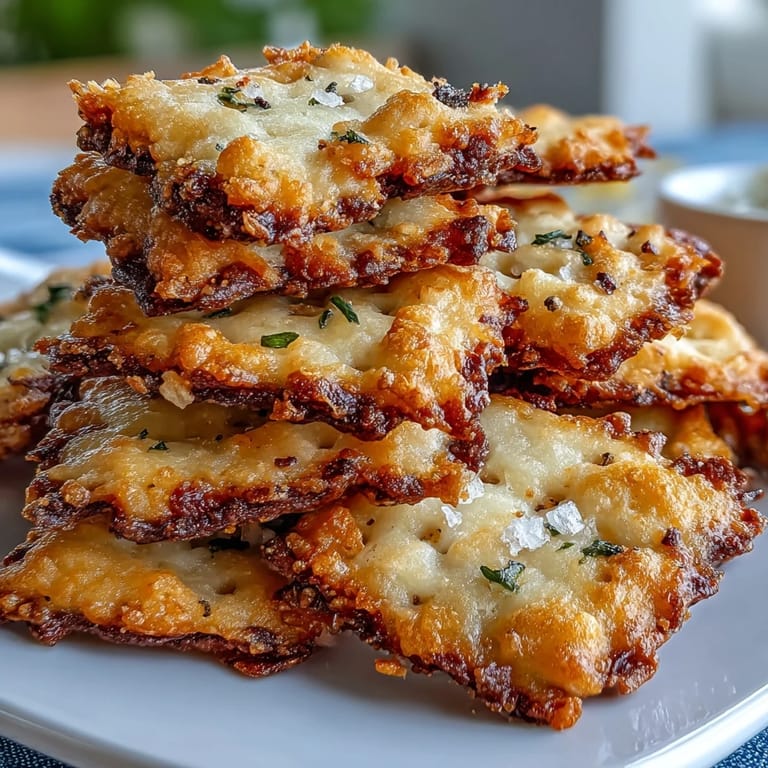
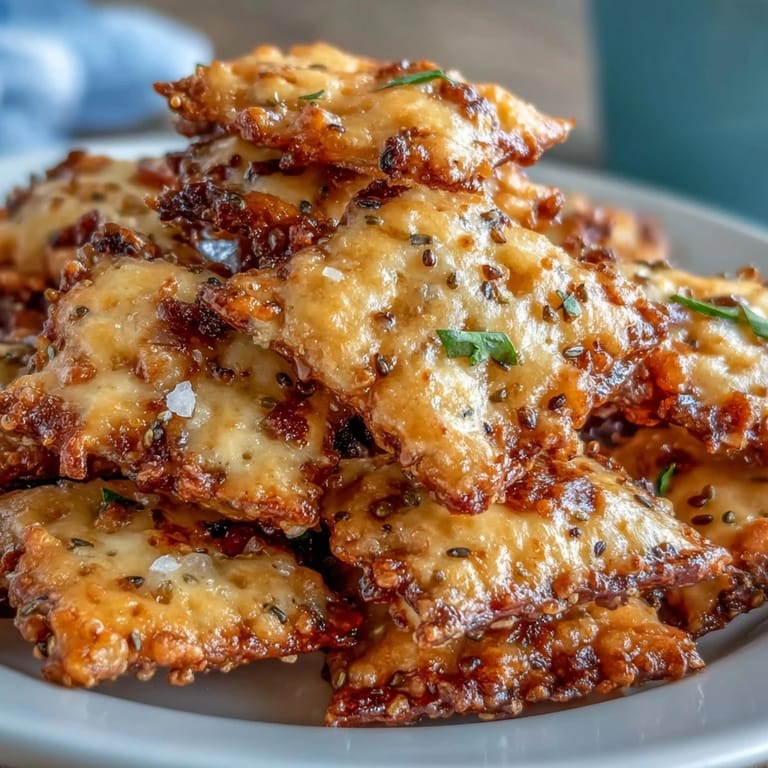
- Lightly brush the rolled dough with olive oil—you want a thin coat, not a puddle—then sprinkle everything bagel seasoning and flaky sea salt evenly across the surface. Use your fingers if you need to, just to make sure nothing gets left behind.
- Cut with confidence:
- Using a pizza cutter or a sharp knife, cut the dough into roughly 1-inch squares—they don't need to be perfect, and honestly, the imperfect ones often crisp up the nicest. Transfer them to your prepared baking sheets with a tiny bit of space between each one.
- Repeat the process:
- Roll out your second dough disk and do the same thing—brush, season, cut, arrange.
- Bake until golden:
- Bake for 16 to 18 minutes, rotating your pans halfway through so they brown evenly. You're looking for that perfect golden-brown color—if they're still pale, they won't be crispy.
- Cool completely:
- Transfer the crackers to a wire rack and let them cool all the way down before storing; this is when they get their final crispness. Eat a few warm if you want, but I promise they're better when they've cooled.
 Save
Save My friend texted me the next day asking if I could make a double batch for her book club, and that's when I realized these little crackers had transcended snack territory. They became the thing people remembered, the reason someone said yes to my house instead of ordering pizza.
Sourdough Discard Is Your Secret Weapon
Using sourdough starter discard here is brilliant because it gives you that subtle tang that makes people try to guess what makes these taste different from regular cheese crackers. The longer your starter has been sitting unfed, the more assertive the flavor will be, which honestly works in your favor. I've used discard that's been sitting in the back of my fridge for a week, and the results were slightly more sour and absolutely delicious—no waste, pure transformation.
Customizing Your Flavor Profile
The beauty of this recipe is how adaptable it is once you understand the base. I've swapped half the cheddar for sharp parmesan when I wanted something more intense, and I've even added a pinch of cayenne pepper for a friend who likes heat. The dough stays forgiving as long as you don't add more than a tablespoon of extra dry ingredients total, because moisture balance is the real game.
Storage and Staying Power
These crackers stay crispy in an airtight container for about five days, though they rarely last that long in my house. If they ever do get soft, pop them back in a 300°F oven for five minutes and they'll snap right back to life. I've even frozen the unbaked dough disks for up to a month, and they roll out and bake just as well as fresh ones.
- Let cooled crackers sit on the counter for 10 minutes before sealing them away so any remaining steam escapes.
- Keep them in a glass container rather than plastic if you can, since glass breathes slightly better and keeps them crisper longer.
- If you're taking them to a party, pack them in a sealed container right up until serving so they stay at peak crispiness.
 Save
Save These crackers taught me something unexpected: sometimes the best recipes come from trying to solve a problem, not from following a fancy cookbook. Now whenever I have discard, I think about these little squares instead of feeling guilty about waste.