 Save
Save My kitchen smelled like an Italian candy shop the afternoon I first made candied orange peel—sharp citrus mixing with the warm sweetness of simmering sugar. A friend had left me a box of homemade versions from her grandmother's recipe, and I became obsessed with understanding how something so delicate and glossy could come from ordinary orange skin. After some research and a few slightly burnt attempts, I cracked the technique, and now these jeweled strips are my go-to gift for people who genuinely appreciate the effort behind beautiful food.
I made a batch for my book club one winter evening, and watching people's faces light up when they bit through the chocolate into that bright, tender citrus was genuinely thrilling. One member asked if I'd started a candy business; another immediately requested them for her holiday gift list. It became clear that homemade candied peel sits in that rare category of treats that feel impossibly fancy but prove you were actually in the kitchen caring about the details.
Ingredients
- Organic oranges (4 large): The skin is the star here, so choose unblemished fruit that hasn't been waxed or sprayed—your nose will thank you when the peel releases its oils during cooking.
- Granulated sugar (2 cups): This sweetens and preserves the peels while cooking them down to that perfect translucent texture; don't skip the quality here because it's the main flavor player.
- Water (1 cup): Keeps the sugar syrup fluid enough to gently cook the peels without burning them on the bottom of the pan.
- Dark chocolate, 70% cocoa or higher (7 oz): The bittersweet coating balances the sweetness beautifully; anything less than 70% cocoa will taste cloying against the citrus.
- Extra granulated sugar (optional): A coating of sparkling sugar adds visual appeal and texture contrast if you're feeling fancy.
Tired of Takeout? 🥡
Get 10 meals you can make faster than delivery arrives. Seriously.
One email. No spam. Unsubscribe anytime.
Instructions
- Prepare your oranges:
- Wash and dry them thoroughly under running water, then score the peel into quarters with a sharp knife and gently remove the skin, keeping the white pith attached as much as possible—this pith is your friend because it holds the peel together during cooking. The goal is peels that stay intact, not ragged confetti.
- Cut into strips:
- Slice the orange peels lengthwise into quarter-inch wide strips, trying to keep them relatively uniform so they cook at the same rate. Smaller strips mean faster cooking but more fiddly work; thicker ones are more forgiving but take longer.
- Blanch away the bitterness:
- Place the strips in a saucepan, cover with cold water, and bring to a rolling boil, then drain completely. Repeat this process two more times—this is tedious but absolutely worth it because each blanch removes bitter compounds that would otherwise make you pucker. You'll notice the water gets clearer each time, which is a good visual sign you're making progress.
- Build your simple syrup:
- In a clean saucepan, combine 2 cups of sugar and 1 cup of water, then bring to a simmer over medium heat, stirring occasionally until the sugar fully dissolves into a clear liquid. Once it's glossy and smooth, you're ready to add your blanched peels.
- Simmer gently until translucent:
- Add the blanched orange peels to the syrup and reduce the heat to low, then let them simmer for 45 to 60 minutes, stirring occasionally so they cook evenly. You're watching for that magical moment when the peels turn from opaque white to glowing, almost stained-glass translucency—this is how you know the sugar has infused the entire peel and the texture has become tender rather than chewy.
- Dry without stickiness:
- Using tongs or a slotted spoon, carefully lift each peel from the syrup and lay it on a wire rack set over parchment paper, spacing them so air can circulate underneath. Let them dry for at least an hour at room temperature until they're no longer tacky to the touch—patience here prevents them from clumping together later.
- Optional sparkling coat:
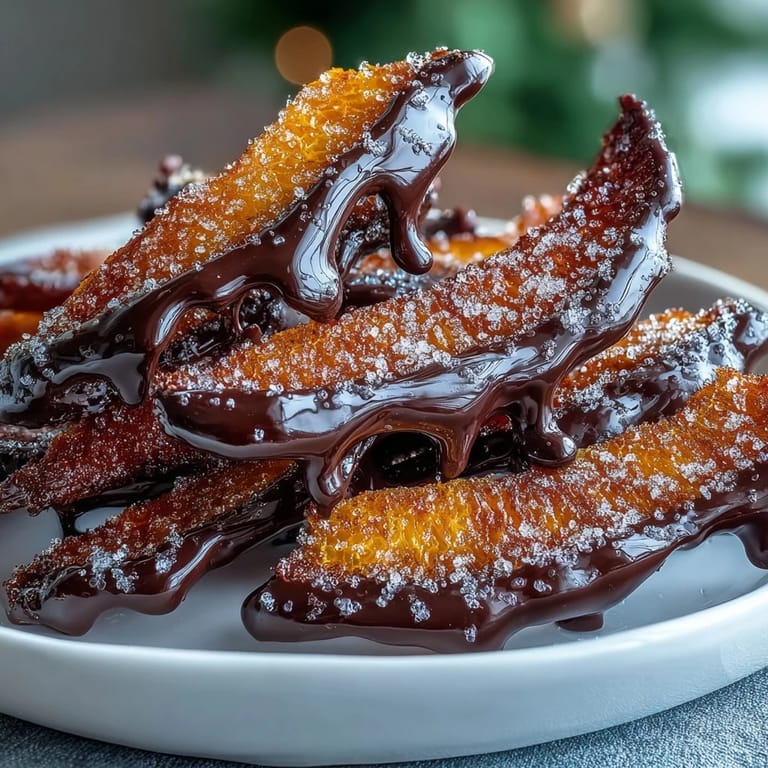
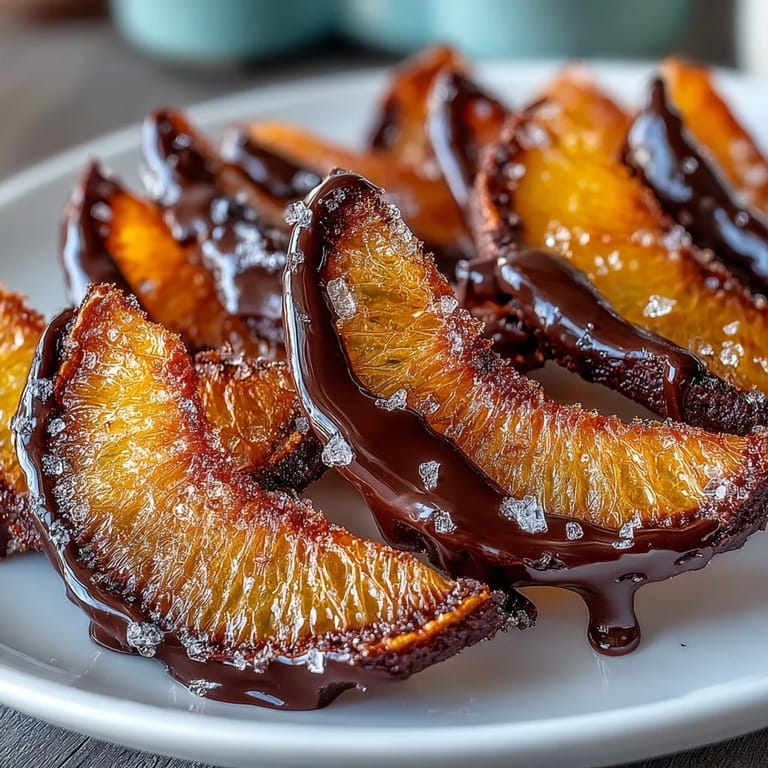
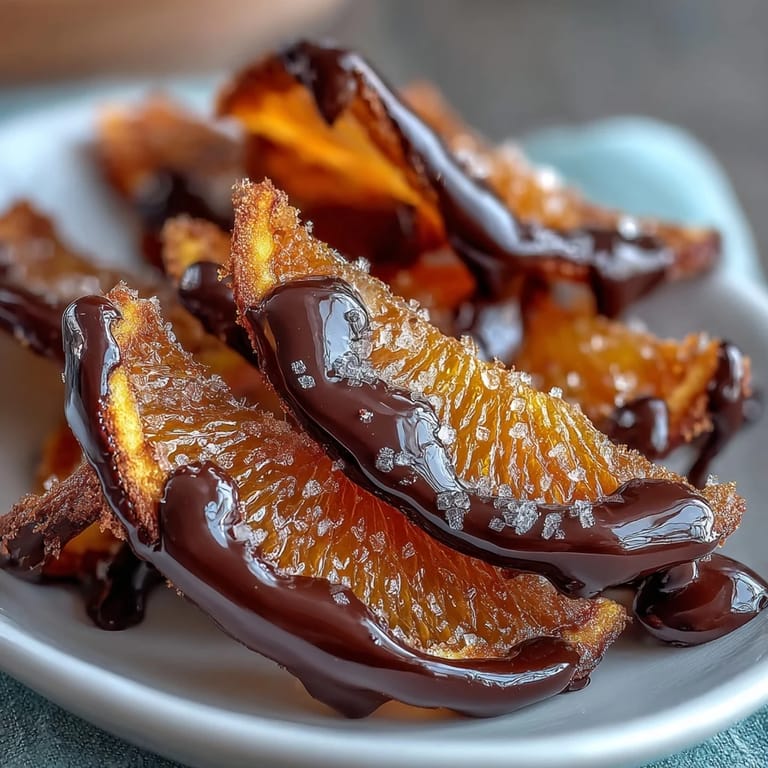
- If you'd like that bakery-style sparkle, toss the dried peels gently in a bowl with extra granulated sugar while they're still slightly warm so the crystals stick.
- Melt chocolate carefully:
- Fill a saucepan with about an inch of water and bring it to a bare simmer, then place a heatproof bowl on top (it shouldn't touch the water) and add your chopped dark chocolate, stirring until completely smooth and melted. The gentle heat prevents the chocolate from becoming grainy or burnt-tasting.
- Dip with confidence:
- Hold each candied peel by one end and dip it halfway into the melted chocolate, giving it a slight twist and letting the excess drip back into the bowl before placing it on clean parchment paper. Working quickly here means the chocolate sets with a nice finish rather than developing a cloudy coating.
- Let chocolate set:
- Allow the chocolate to harden completely at room temperature for about 30 minutes or in the refrigerator for 10 minutes, then transfer to an airtight container. They'll keep for up to two weeks, though honestly they rarely last that long in my house.
 Save
Save Years later, I realized that making these candied peels became a meditation for me—something about the repetitive stirring and the slow transformation of ordinary fruit into something precious. My partner now asks me to make them in autumn when the first good oranges appear at the market, not for the taste alone but because the whole kitchen shifts into that calm, deliberate mode where nothing else matters.
The Science of Candying
Candying is essentially a controlled dehydration where sugar replaces the water in the fruit's cells, which is why the peels become translucent and chewy rather than brittle or mushy. The blanching step removes bitter compounds from the white pith so the final candy tastes clean and bright rather than harsh. Understanding this helps you troubleshoot—if your peels come out tough, you either didn't simmer them long enough or your heat was too high; if they fall apart, you simmered too long or your syrup was too thin.
Flavor Variations Worth Exploring
While the classic version with dark chocolate is hard to beat, I've found that adding a cinnamon stick or a few whole cloves to the syrup while the peels simmer creates subtle warmth that pairs beautifully with the chocolate. Some friends have experimented with swapping the dark chocolate for white chocolate or a milk chocolate hybrid, which shifts the whole flavor profile toward sweetness—perfectly valid but a different dessert entirely.
Gifting, Storing, and Making It Last
These candies stack beautifully in small boxes lined with parchment paper, and they look intentional enough to feel like a professional gift even though you made them in your own kitchen. Store them in an airtight container at room temperature away from heat and humidity, and they'll stay perfect for up to two weeks. They also freeze surprisingly well for up to two months if you want to make them ahead for holiday gifting.
- Line your storage box with parchment to prevent the chocolate from sticking to cardboard.
- Keep them away from strong-smelling foods since they absorb odors easily.
- A handwritten label with the date and contents makes even casual treats feel like a thoughtful gift.
 Save
Save Making these candied orange peels taught me that patience and precision can transform waste into something worth savoring and sharing. Every time someone bites through that glossy chocolate into the bright, tender peel, I feel a quiet satisfaction knowing they're tasting the care that went into creating something both elegant and deeply human.
Recipe FAQs
- → How do I reduce bitterness in orange peels?
Blanch the strips by boiling and draining them three times to remove excess bitterness and soften the peel before candying.
- → What chocolate works best for coating?
Use high-quality dark chocolate with at least 70% cocoa for a rich flavor that complements the citrus notes.
- → Can I enhance the flavor of the candying syrup?
Add a cinnamon stick or a few cloves to the syrup during simmering for subtle warm spice nuances.
- → How do I ensure the chocolate coating sets properly?
Allow dipped peels to rest at room temperature for 30 minutes or refrigerate for 10 minutes until the chocolate firms up.
- → What is the best way to store the finished strips?
Keep them in an airtight container at room temperature for up to two weeks to maintain freshness and texture.